A Step by Step Guide
To create an eCATT you must first create the Test Script. After the test script you will create a Test Configuration. In many cases it is also helpful to create a Test Data Container and/or a System Data Container but these will not be used in this example
Click create or F5 and you will then see the following screen.
Enter title
Enter component
Click on Pattern button on menu bar
<<<Record the function you are attempting to perform>>>
After backing out of the function you were recording you will be returned to the eCATT screen and you Should see a prompt asking if you want to transfer the data. Answer Yes. You should then see the following:
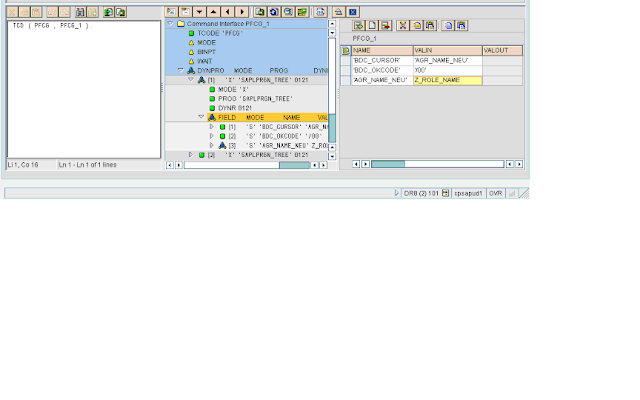
Now double-click on the Interface. In this case the interface was named PFCG_1.
This is done by opening the Dynpro menu and going through each numbered screen to review your input. In this process my eCATT will change the description of a role. So I will have two variables:
1) The role name
2) The description.
From the screen print above you can see I located the Role Name on the first screen by double-clicking on the menu node named “Field.” You must then move over to the third sub screen and tab over to the VALIN Column where you find the actual value you entered into SAP when recording the interface. In this case that value is “ZP: FI: AM: DSP_RPT.” You must then change that to a variable as shown on the next screen.
 The variable name is Z_ROLE_NAME. Once you enter the variable name hit the enter key and the following screen will appear:
 The default parameter type will be Local. You should change this to Import and click on the Yes button.
The screen will now look like the following screen. Note the  icon on screen 1 has changed from the green square. This icon indicates a variable is present.
Now change all the other variables in the same manner. When complete click on the save icon and save as a local object or place in a development class if you desire to transport the eCATT.
Before you can execute the eCATT you must first create a Test Configuration. Do this by executing SECATT transaction code and entering a name for the Test Configuration and clicking on the create icon.
This name can be anything in the customer name space
- Give the Test Configuration a Name and Component and then click on the Configuration tab to see the following screen.
- Enter the name of the test script you would like to execute when you execute the test configuration. In thiscase it is the test script of the same name. See below.
- Now we need to create the Excel template file to store the variable data in. Do this by clicking on the
 download icon or just press ctrl-shift-F11. You will then be prompted with a Windows “save as” dialog box.
 - Accept the default name and directory and clicks save.
- Back in SAP you should now see this screen.
- This appears since we did not create a Test Data Container. Click on the Yes icon and you should see the message at the bottom of the screen “variants successfully downloaded
- Now click on the Variants icon and you should see the following screen.\
- We must now set the default Mode for each time the Test Configuration is executed. Since we will always be running the script with an external file choose the External Variants / Path option.
- Now click on the drop-down on the File and choose the variant file you just created in the previous step.
- Your screen should look similar to the one shown here.
- Now click on the save icon and save as a local object or place into a development class (package) so it can be transported.
- You are now ready to execute your new eCATT Test Script via the Test Configuration. Open your txt file and Populate with your data. Be sure and number each record in your data file or eCATT will not be able to read the data correctly. When you are done it should look similar to this:
- Save your Excel file but be sure to keep it as a plain text file. If you update it to the .xls format, then SAP will not be able to read the file.
- Now go back to SAP and run tcode SECATT and enter your Test Configuration and click execute. You will be taken to this screen:
- You can choose your error behavior. I normally change it to “S No Termination, Continue with Next Script Command”.
- Next click on the variants tab and validate the mode and file path are correct.
- Then click execute and you are done.
- NOTE: If you are running the test script remotely you must create a system data container to store the name of all the possible RFC connections you may potentially need when executing a script. These RFC connections are taken from table RFCS (see SM59). Then in the Test Configuration you reference the System Data Container name and the specific Target System. This information is found under the Shared tab in the Test Configuration.
- Now you are ready to execute the eCATT.


